


Hello everybody!
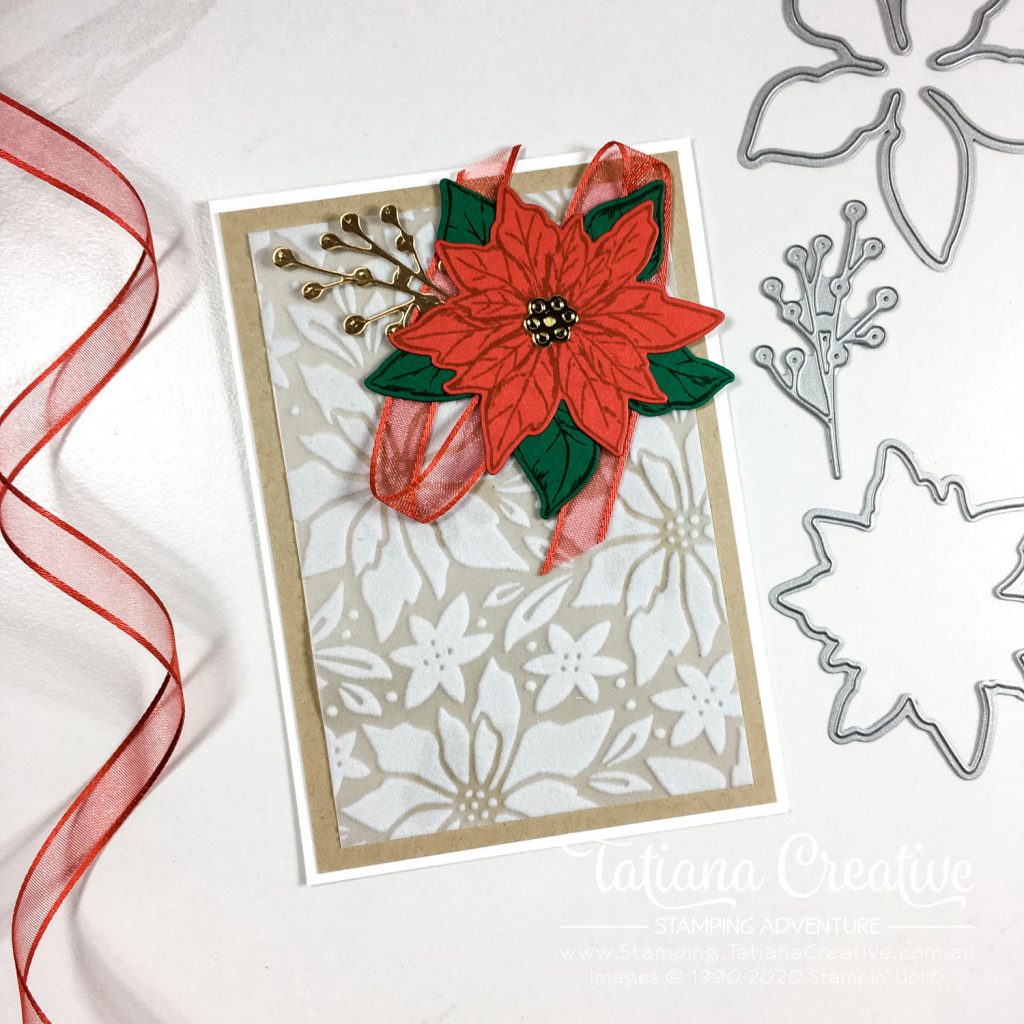
Welcome to my blog! Last week the August to December 2020 Mini Catalogue launched to customers. It’s always an exciting time when customers get to purchase from new products. I love sending out catalogues to my customers and I always enjoy creating a special card to include with the mail out. Today I’m sharing the card I created using the new Poinsettia Place Suite products (one of my favourite suites in this Mini Catalogue).
[All supplies used in this project are shown at the end of this post and are linked to my Stampin’ Up! online store. You can purchase them and create this project too! Thank you for your support of my stamping adventure]
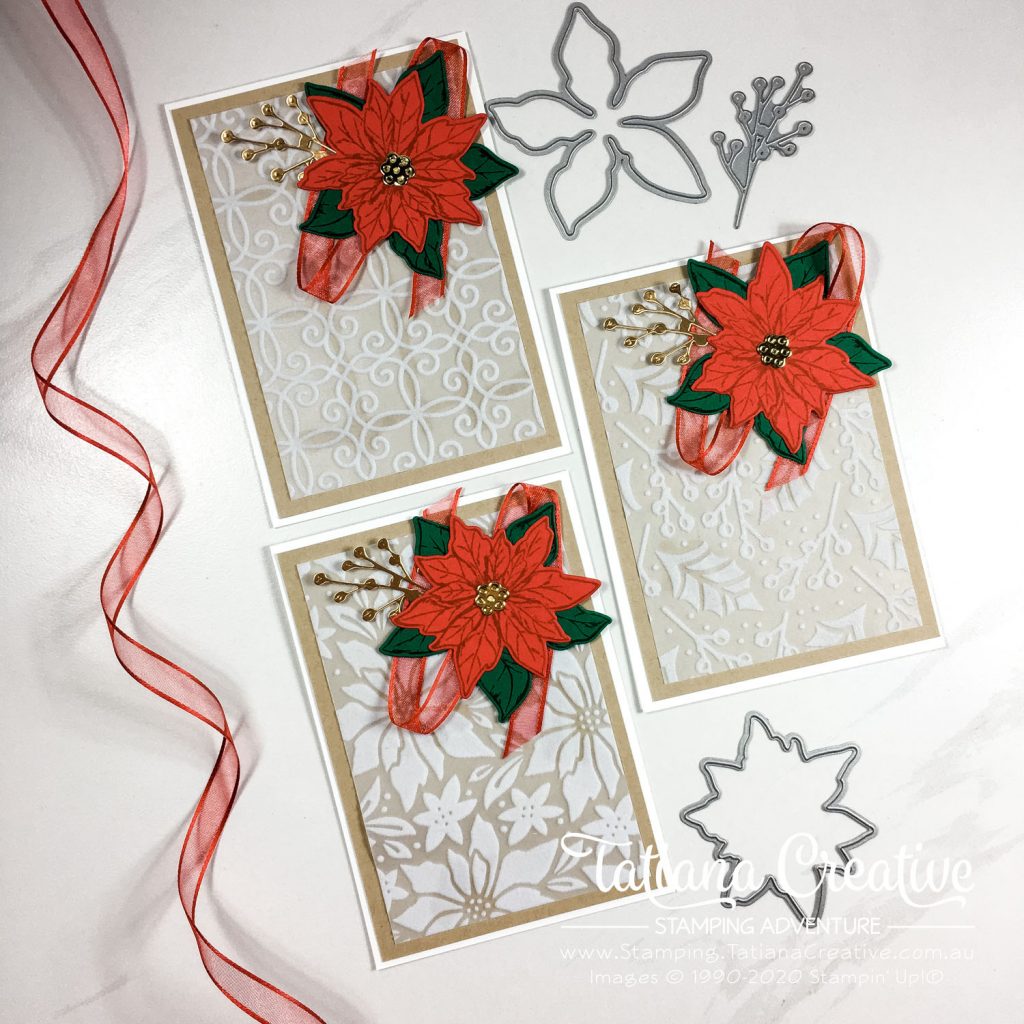
This card was super easy to make and really is so pretty thanks to the stunning products. The photos really do not do the Plush Poinsettia Specialty Paper any justice. It is sooooooooooo pretty and really lovely to touch.
Card Details:
- Card Base: Whisper White Thick
- Card Front: Crumb Cake (10 x 14.3 cm) and Plush Poinsettia Specialty Paper (9 x 13.3 cm)
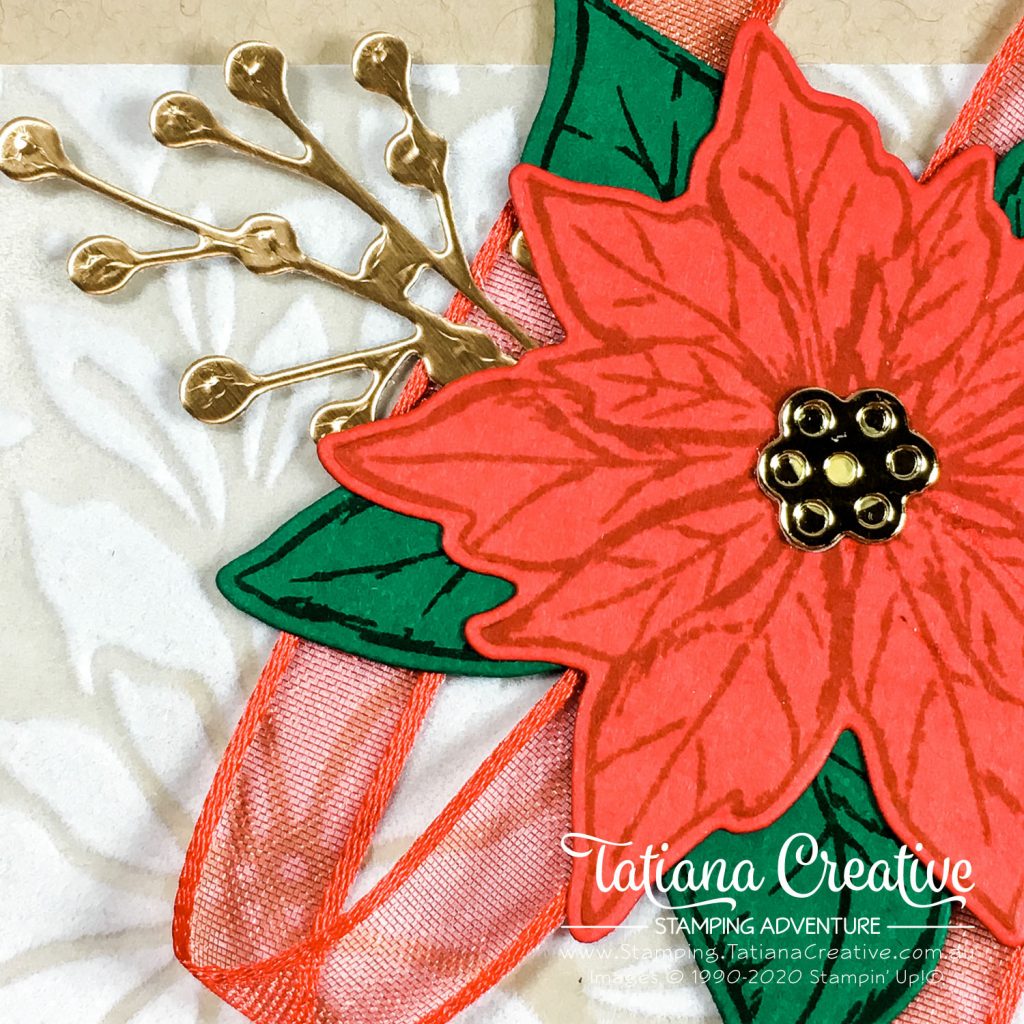
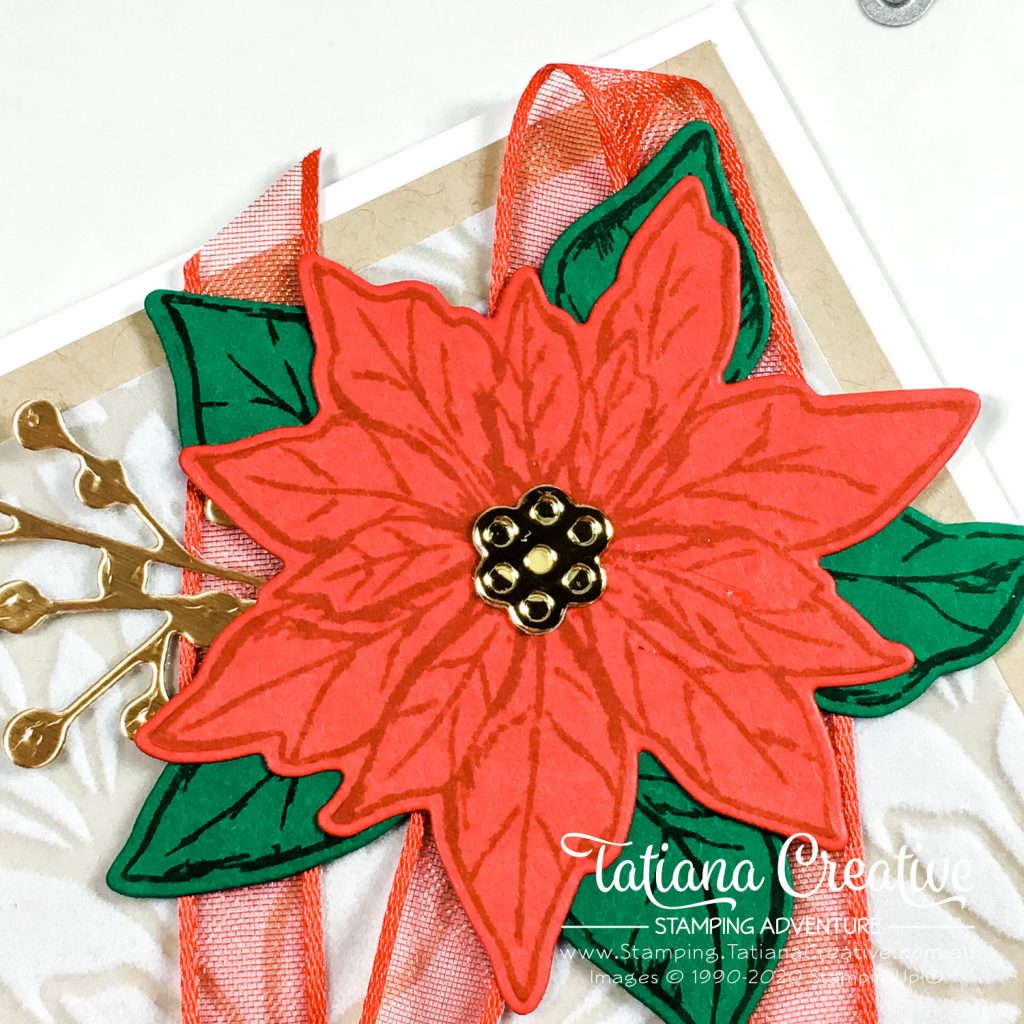
- Stamp the full poinsettia flower image in Real Red on Real Red cardstock and die cut using the coordinating die from the Poinsettia Dies.
- Stamp the largest poinsettia flower image in Shaded Spruce on Shaded Spruce cardstock and die cut using the coordinating die from the Poinsettia Dies.
- From the Gold Brushed Metallic Cardstock I die cut the centres (two layers) and the sprigs from the Poinsettia Dies.
- To assemble the flower adhere the red flower to the green, add the gold centres and the sprig behind.
- Adhere card fronts to the card base. TIP: Put glue behind the plush elements of the Plus Poinsettia Specialty Paper so that the glue won’t show through.
- Add a strip of Tear & Tape to the front of the card to where you will place the flower. Add the Real Red Sheer Ribbon (29 cm) on top placing it as you’d like. TIP: Tear & Tape holds it well but also allows for you to adjust the ribbon as you need.
- Adhere the flower on top of the ribbon.
The beautiful Plush Poinsettia Specialty Paper come in three different designs. I couldn’t decide which one to use for the these cards and since I was making multiples I decided to use all three!
Thank you for visiting my blog! I hope that I’ve inspired you to be creative.
Bye for now!
Tatiana
- Join Stampin’ Up!® to start getting your products at 20% discount: CLICK HERE
- Request a Catalogue to see what products you can purchase: CLICK HERE
- Subscribe to my newsletter to keep up to date with the latest news: CLICK HERE
- Follow me on Facebook for regular updates and inspiration: CLICK HERE
- Go SHOPPING for clearance items and specials: CLICK HERE
If you live in Australia you can purchase Stampin’ Up!® products from my online store.
Current Host Code (August 2024): NN39AWU4
(Use the hostess code when ordering less than $250. All orders over get a handmade card from me. Orders over $50 will receive a FREE gift, and collect stickers part of my Customer Loyalty Program! Orders over $90 will also get a FREE tutorial bundle the following month!!). Click here to shop now using the current Host Code.
Supplies:
You can purchase the of the supplies I used in this project. Please click on the image below to purchase. Thank you for your support.
")
")


 Sheer Ribbon")

