


Welcome to Kylie’s Demonstrator Training Blog Hop. You are visiting Tatiana in Australia. This blog hop is with a group of Stampin’ Up!® Independent Demonstrators who are taking part in Kylie’s Demonstrator Training. Our training is to help build our own Stampin’ Up!® businesses. My goal from this year’s training (our Stampin’ Up!® year started on 1st October) is to learn more about what is needed to earn the 2021 incentive trip!!!
The training group is filled with so many wonderful demonstrators from all over the world. I am loving being a part of this supporting community. It can be challenging when you want to turn Stampin’ Up!® into a business that supports your family and not knowing where to start and that you are going about things the right way can be confusing and overwhelming on your own. This training gives us ideas a pointers on how to build our business. Part of our training is blog hopping!
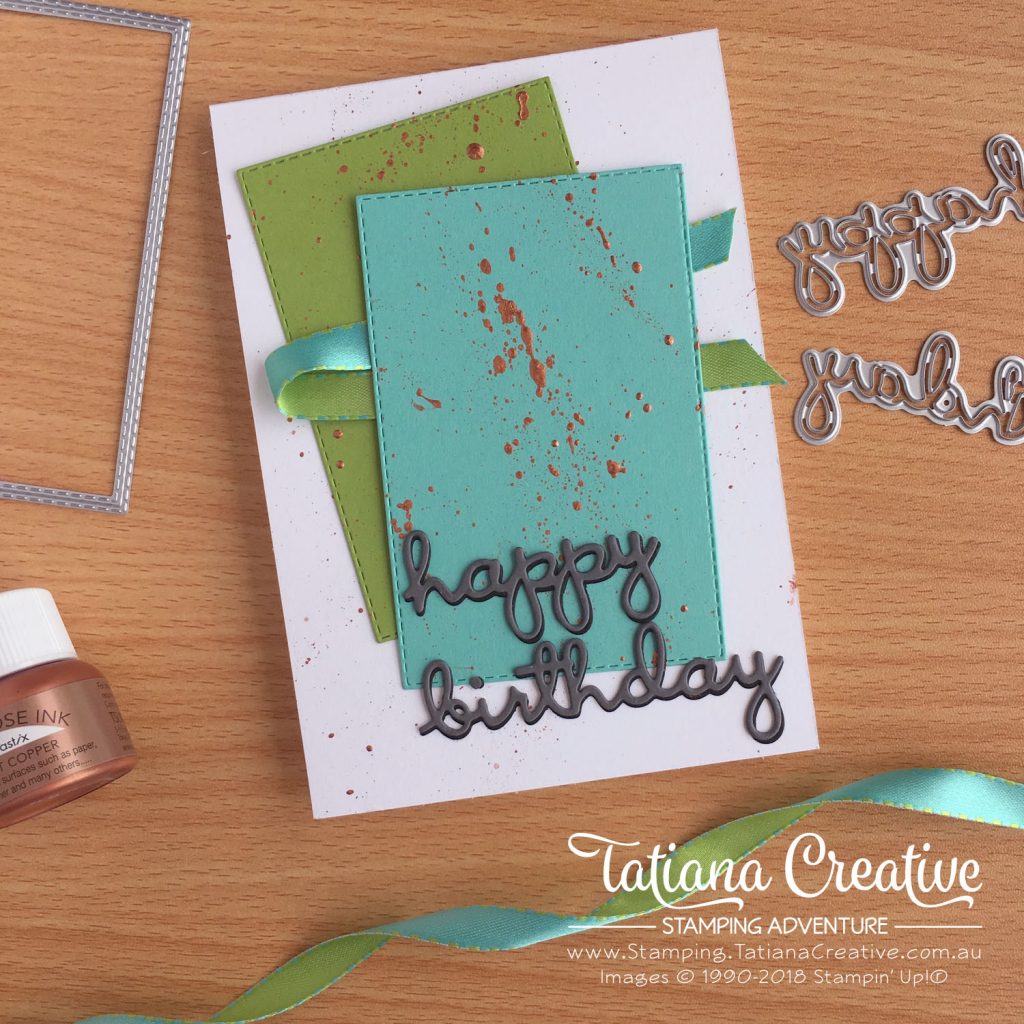
This month’s card I created using products from the upcoming 2019 Occasions catalogue and combined them with my product of the week Shimmer Paint. I also set myself the challenge to make a masculine birthday card that was still “my style” and I think I’ve achieved this goal quite well:
All supplies used in this card are shown at the end of this post in the thumbnails. These are linked to my Stampin’ Up! online store.
To create this card:
Card Base: Whisper White Thick
Card Fronts: Granny Apple Green and Costal Cabana cut using the 4th largest Rectangle Stitched Framelits Die
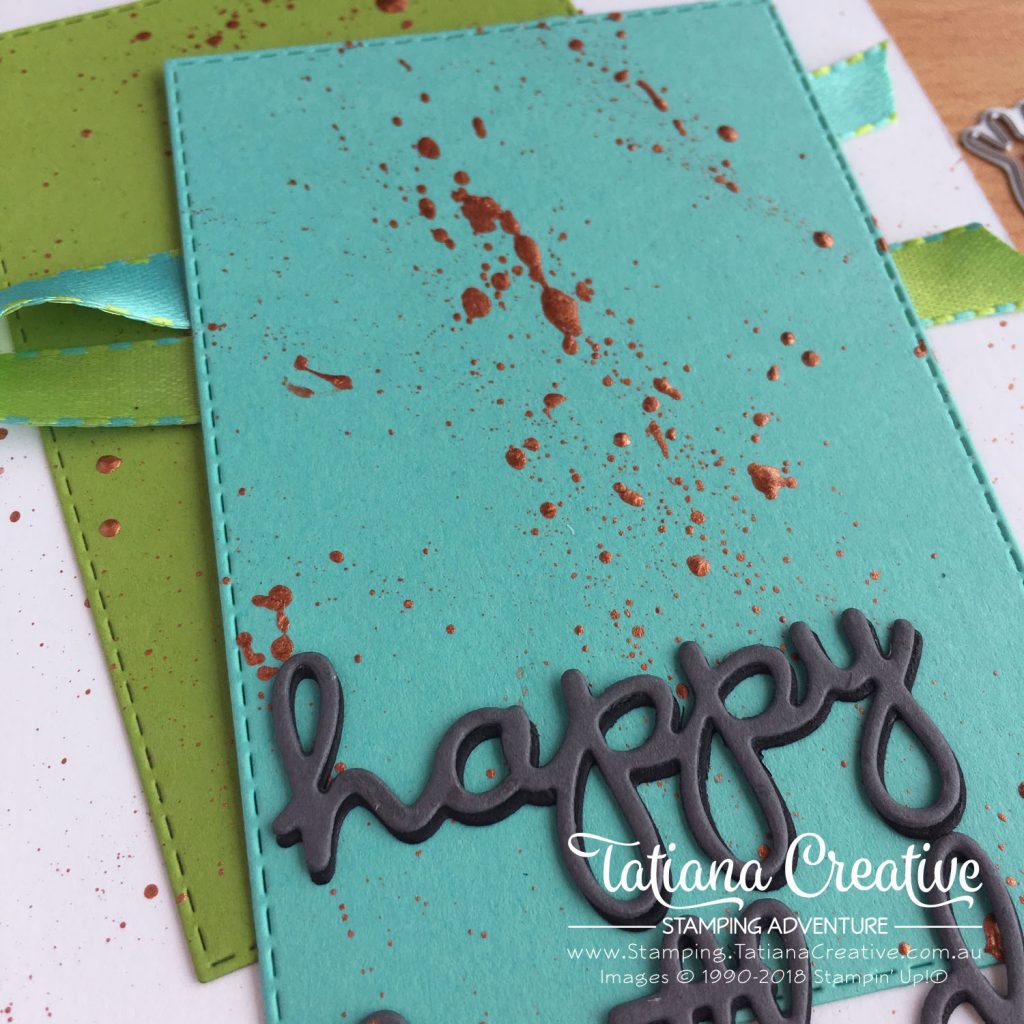
- Take your card base and card fronts and flick Bright Copper Shimmer Paint onto them. I used a dry Aqua Painter and flicked the brush tip on a scrap piece of card stock. TIP: use some Grid Paper to protect your work surface. Allow to dry. If you want you can do this to the envelope too!
- Die cut the words happy and birthday from the Well Written Framelits Dies in both Basic Gray and Basic Black card stock. You can only die cut one set, I recommend Basic Black if you only use one.
- To assemble:
- Adhere the Granny Green card front to the card base using Liquid Multipurpose Glue
- Attach a strip of the Costal Cabana / Granny Green Reversable Ribbon to the back of the Costal Cabana card front and then adhere to the card base.
- Using the sponge glue method (Liquid Multipurpose Glue with a Stamping Sponge wedge) adhere the Basic Gray sentiment to the Basic Black with the latter slightly showing to create a shaddow appearance. Adhere to card front.
My colour scheme was inspired by the new Costal Cabana / Granny Green Reversable Ribbon. I’m in love with this ribbon. It is soooooooooo pretty. I know ribbon isn’t quite masculine, but here I’ve used it as a bit of a banner.
I am loving being a demonstrator. It has brought so much to my life. One of my favourite parts of being a demonstrator is that you can do as little or as much as you want with your business. You can simply enjoy the discount (YAY) or you can work towards building a business like I am with this group of amazing demonstrators.
I am loving being a demonstrator. It has brought so much to my life. One of my favourite parts of being a demonstrator is that you can do as little or as much as you want with your business. You can simply enjoy the discount (YAY) or you can work towards building a business like I am with this group of amazing demonstrators. You can join my team if you would like to earn a discount or to start your own business. I would love to share this amazing adventure with you. Email me for more information or click here to join.
Below you will find the list of demonstrators who are blogging with me today. They all have wonderful projects to share with you, please take some time to visit their pages. Happy Blog Hopping! You have been visiting Tatiana Tobin in Australia!
Thank you for visiting my blog! I hope that I’ve inspired you to be creative.
Bye for now!
Tatiana
- Join Stampin’ Up!® to start getting your products at 20% discount: CLICK HERE
- Request a Catalogue to see what products you can purchase: CLICK HERE
- Subscribe to my newsletter to keep up to date with the latest news: CLICK HERE
- Follow me on Facebook for regular updates and inspiration: CLICK HERE
- Go SHOPPING for clearance items and specials: CLICK HERE
If you live in Australia you can purchase Stampin’ Up!® products from my online store.
Current Host Code (August 2024): NN39AWU4
(Use the hostess code when ordering less than $250. All orders over get a handmade card from me. Orders over $50 will receive a FREE gift, and collect stickers part of my Customer Loyalty Program! Orders over $90 will also get a FREE tutorial bundle the following month!!). Click here to shop now using the current Host Code.
Supplies:
You can purchase the of the supplies I used in this project. Please click on the image below to purchase. Thank you for your support.


 Reversible Ribbon")


Great card! I love that new Coastal Cabana/ Granny Apple Green Reversible ribbon!
Thank you Christy! I love the ribbon too! Its so awesome.
Cute card nice layout
Thank you Patsy!
I love the way you layered the letters to give them more “dimension” and the simple design of your card. Fabulous!
Thank you so much Alison! That’s exactly what I was going for!
Great card Tania. I love the colours you have used!
Thank you Kate!
You rose to the challenge and created a fab man’s card. The ribbon is a great starting point for the colour combination.
Awe! Thank you Karen! That’s so sweet of you to say!
Love that you got your color inspiration from the ribbon and the copper splatters! Definitely a great unisex card! xx
Thanks Angie! xx