


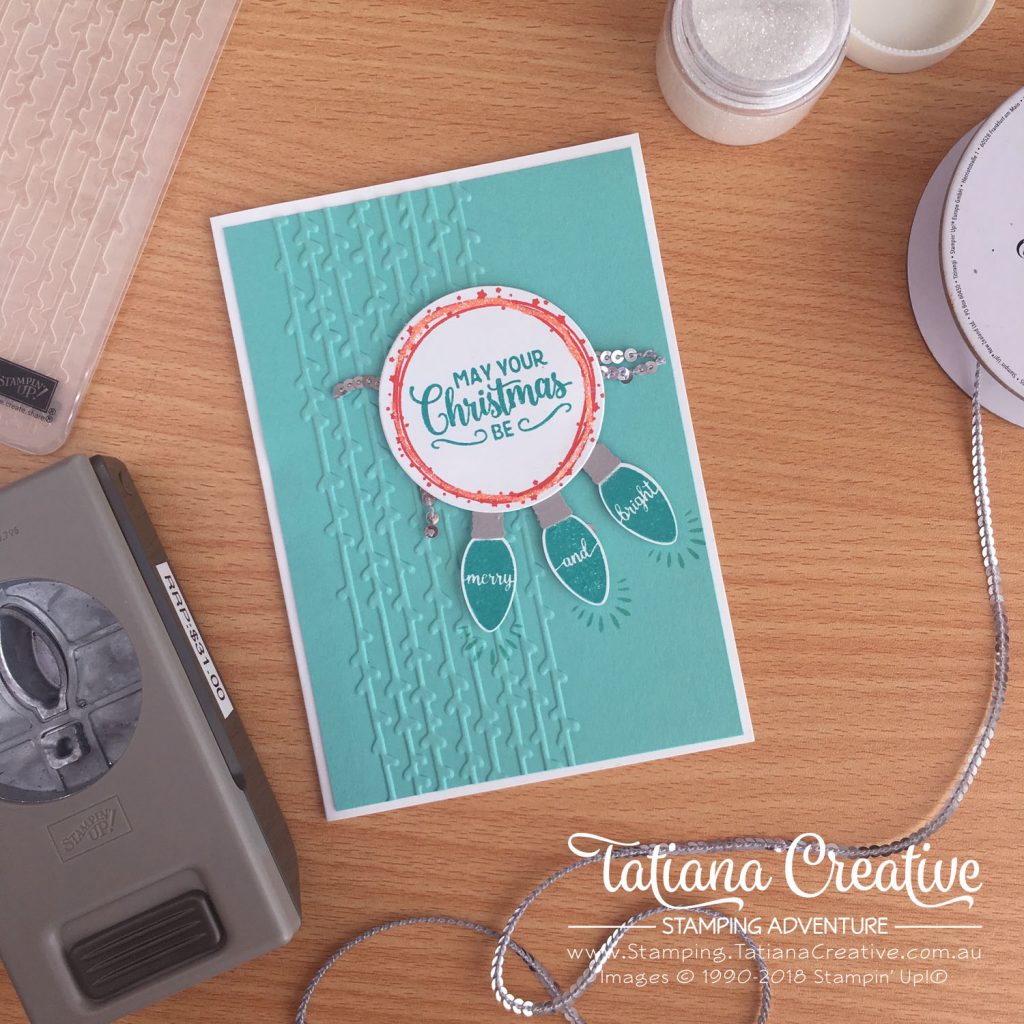
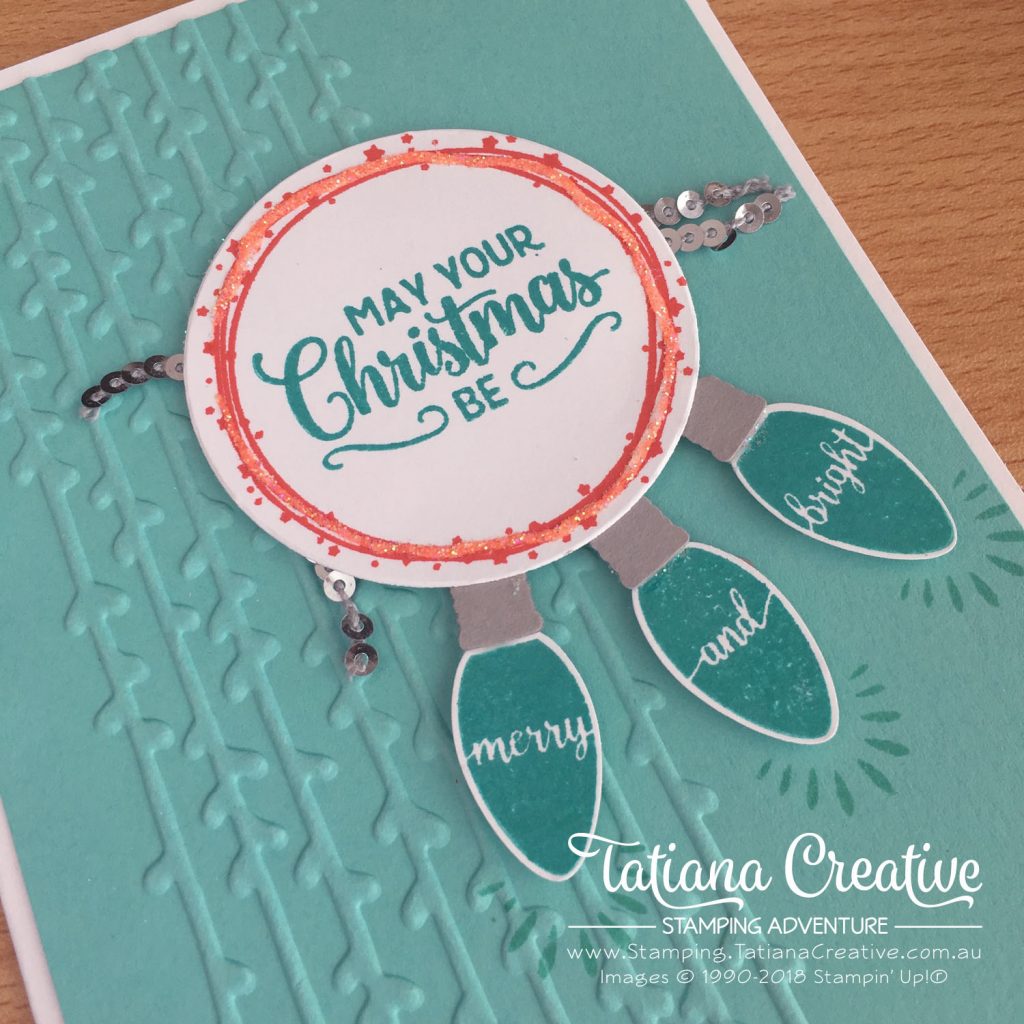
This card I designed for a Christmas Card fundraiser at my son’s school. I thought the sentiment and the fun way that the Christmas lights become a part of the sentiment was just perfect! What’s pretty neat is that you can bundle the stamp set used in this card with the Christmas Bulb Builder Punch and save 10% off both products!!!
All supplies used in this card are shown at the end of this post in the thumbnails. These are linked to my Stampin’ Up! online store.
To create this card:
Card Base: Whisper White Thick
Card Front: Costal Cabana 100mm x 143.5mm
- Run the card front through the Big Shot in the non floral embossing folder of the Petal Pair Texture Impressions Embossing Folders. I think this one looks like strings of fairy/christmas lights!
- Punch out from Whisper White cardstock the 5.7cm Circle and three Bulbs. From Gray Granite punch out some bulb tops. (TIP: use a strip of card stock in the Gray Granite to make it easier to only punch the light bulb tops).
- Using the Stamparatus stamp the light bulbs using the “Merry” “And” “Bright” picture sentiments from the Making Christmas Bright stamp set in Bermuda Bay.
- Use the Stamparatus to position the circle stars stamp (Poppy Parade) and the sentiment “May Your Christmas be” (Bermuda Bay) from the Making Christmas Bright stamp set into the punched out circle.
- With the Fine Tip Glue Pen run a line of glue following the circle stars stamp and then cover in Dazzling Diamonds Stampin’ Glitter. Allow to dry.
- To assemble:
- adhere the card front to the card base.
- adhere two 80mm strips of Silver Mini Sequin to the card front using SNAIL adhesive. Position these to be where the circle sentiment will go.
- attach the bulb tops to the light bulbs with SNAIL adhesive.
- attach sentiment and light bulbs to card front using Stampin’ Dimensionals.
- Optional: to finish off the card you can stamp in Bermuda Bay the shine rays around the light bulbs.
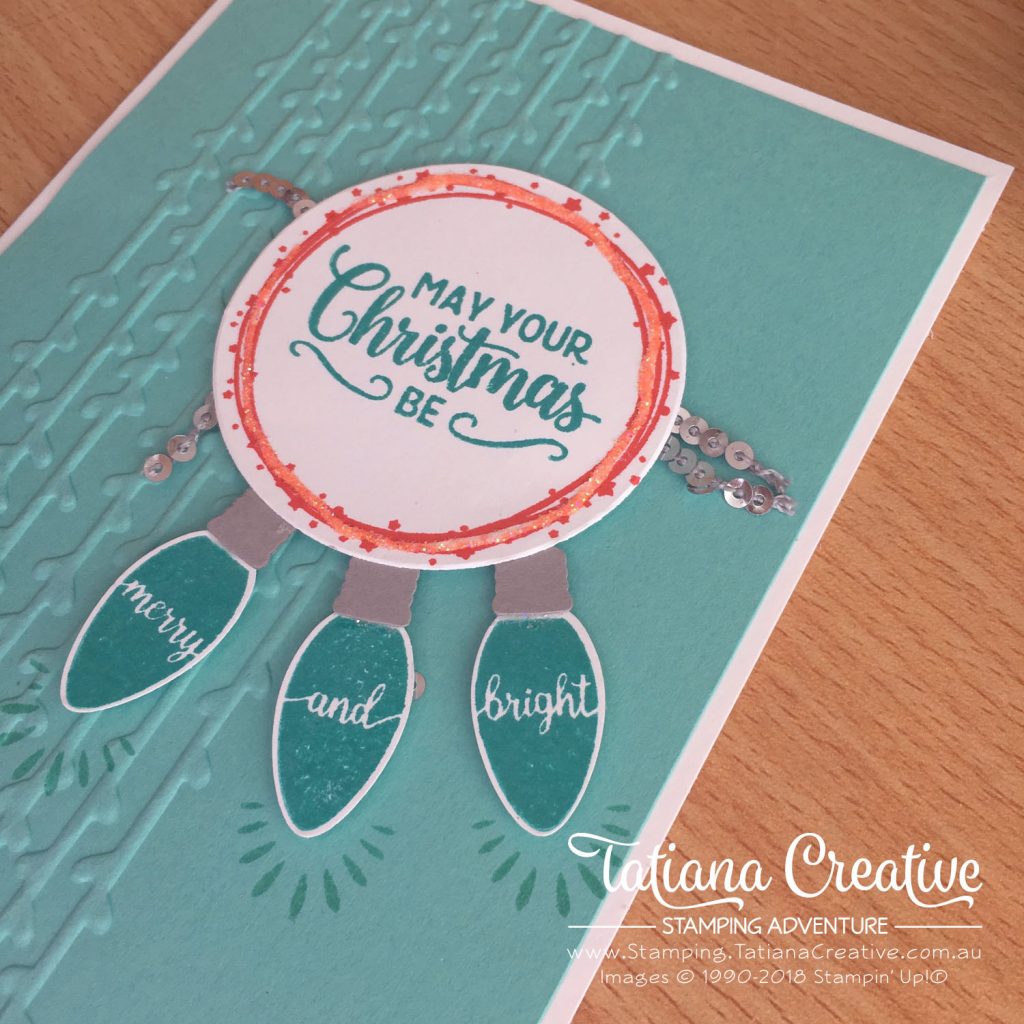
My favourite parts of this card are the merry and bright light bulbs and the Dazzling Diamonds Stampin’ Glitter.
Thank you for visiting my blog! I hope that I’ve inspired you to be creative.
Bye for now!
Tatiana
- Join Stampin’ Up!® to start getting your products at 20% discount: CLICK HERE
- Request a Catalogue to see what products you can purchase: CLICK HERE
- Subscribe to my newsletter to keep up to date with the latest news: CLICK HERE
- Follow me on Facebook for regular updates and inspiration: CLICK HERE
- Go SHOPPING for clearance items and specials: CLICK HERE
If you live in Australia you can purchase Stampin’ Up!® products from my online store.
Current Host Code (August 2024): NN39AWU4
(Use the hostess code when ordering less than $250. All orders over get a handmade card from me. Orders over $50 will receive a FREE gift, and collect stickers part of my Customer Loyalty Program! Orders over $90 will also get a FREE tutorial bundle the following month!!). Click here to shop now using the current Host Code.
Supplies:
You can purchase the of the supplies I used in this project. Please click on the image below to purchase. Thank you for your support.


 Circle Punch")


