


Welcome to Kylie’s Demonstrator Training Blog Hop. You are visiting Tatiana in Australia. This blog hop is with a group of Stampin’ Up!® Independent Demonstrators who are taking part in Kylie’s Demonstrator Training. Our training is to help build our own Stampin’ Up!® businesses. My goal from this year’s training (our Stampin’ Up!® year started on 1st October) is to earn the next incentive trip to Maui in July 2020!!!
The training group is filled with so many wonderful demonstrators from all over the world. I am loving being a part of this supporting community. It can be challenging when you want to turn Stampin’ Up!® into a business that supports your family and not knowing where to start and that you are going about things the right way can be confusing and overwhelming on your own. This training gives us ideas a pointers on how to build our business. Part of our training is blog hopping!
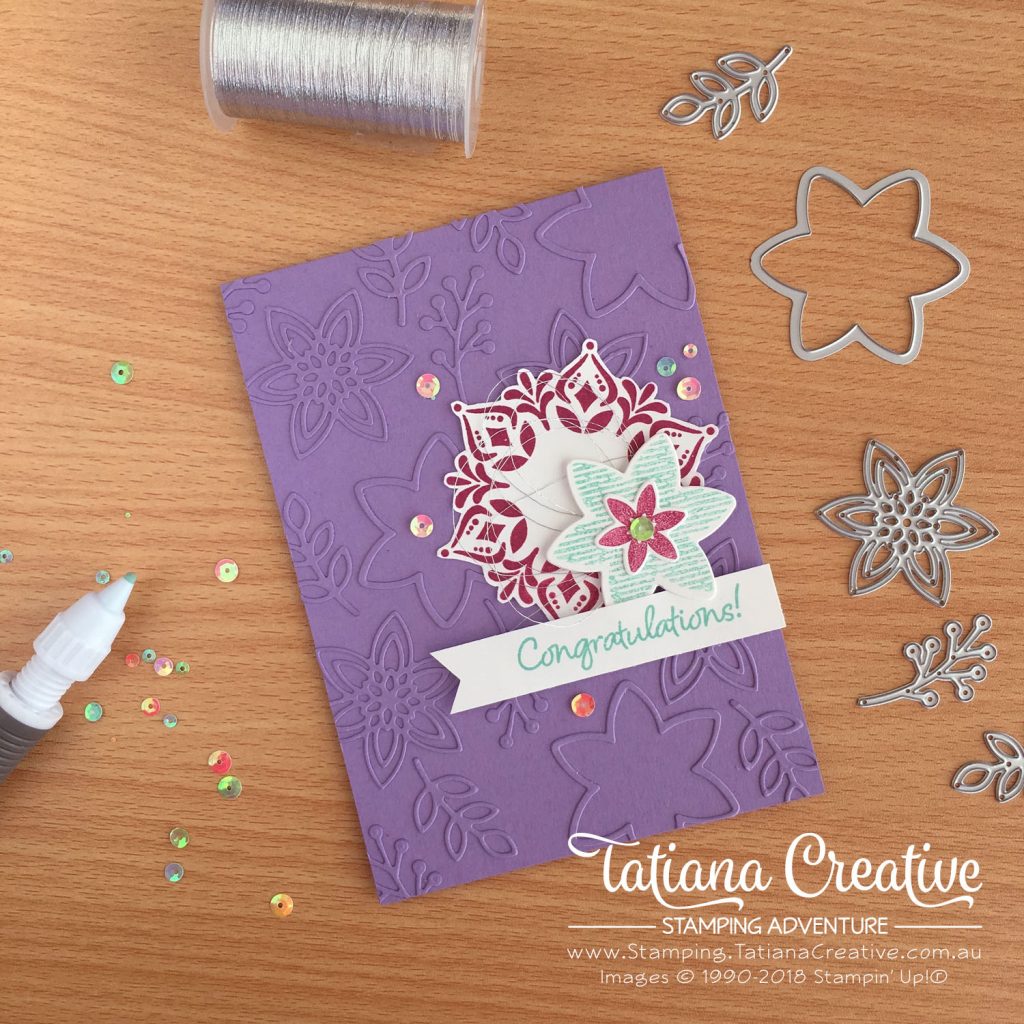
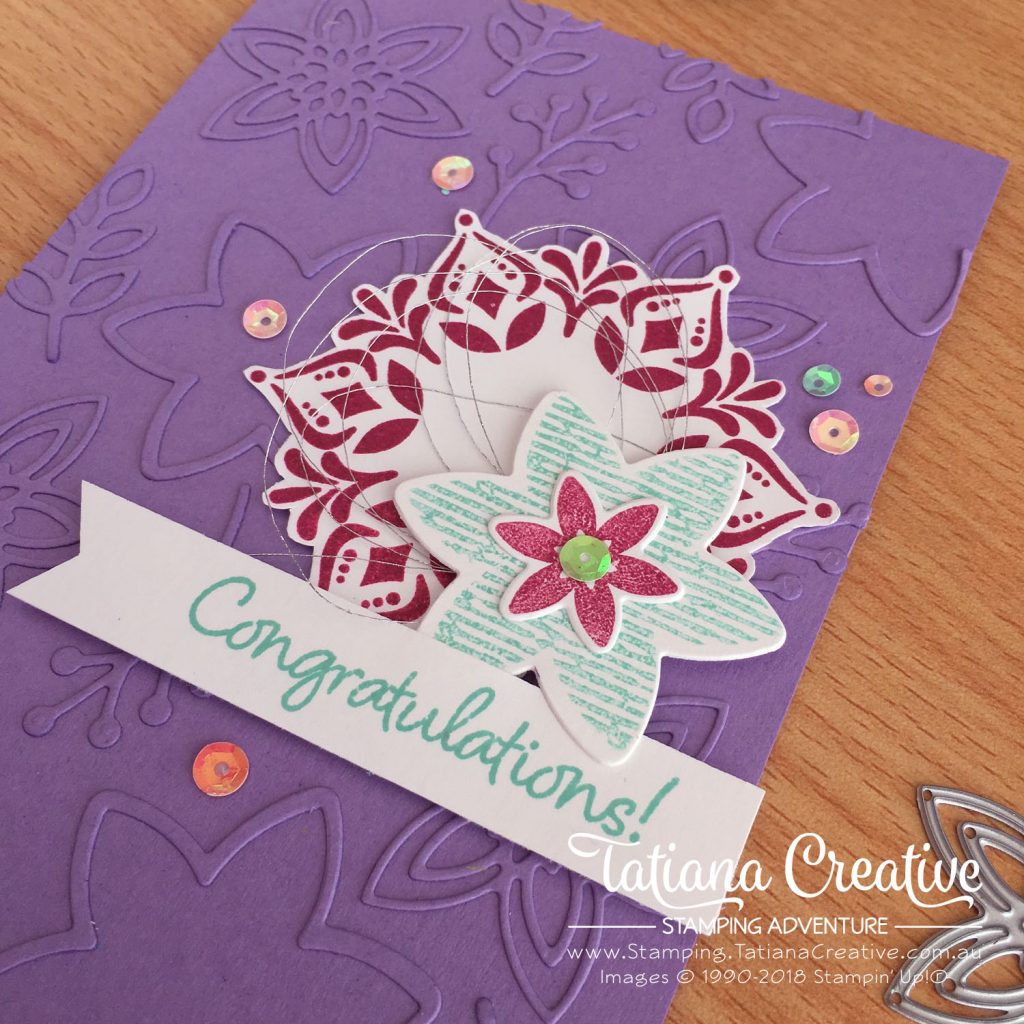
Today’s card I dedicate to all the members of this group – including those who aren’t participating in this blog hop. This card’s sentiment is “Congratulations” because I would like to congratulate everyone on participating in this amazing training.
All supplies used in this card are shown at the end of this post in the thumbnails. These are linked to my Stampin’ Up! online store.

One of the best perks (apart for the Stampin’ Up!® family) of being a demonstrator is that we get to purchase new products ahead of release to the general public. This month we have been able to pre-purchase new items from the Snowflake Showcase. I decided to create todays card with one of the stamp sets from this set, the Happiness Surrounds stamp set.
The inspiration for this card was taken from a photo I pinned on Pintrest. The original card was by Jo Anne Hewins, and I loved how she used die cuts to create a textural background. I’ve don’t the same with my card.
To create this card:
- Prepare card base in Highland Heather.
- Die cut from Highland Heather cardstock various dies from the Snowfall Thinlits. I used the more floral and leaves dies to create a flora feel to the card.
- Arrange these die cut pieces on the card front till you are pleased. Have some going off the edge.
- To adhere the die cut pieces put some Liquid Multipurpose Glue onto the Silicone Craft Sheet. Using a wedge of a Stamping Sponge dapped into the glue, pat it onto the back of the die cut piece and then position onto the card front. I’ve found this a very cost effective method of adhering intricate pieces such as these. The other option is to use the Multipurpose Adhesive Sheets on the back of the Highland Heather cardstock before starting to die cut. I’ve found you waste a lot it in this card and don’t recommend it.
- Once all the pieces adhered trim off the overhangs with Paper Snip Scissors.
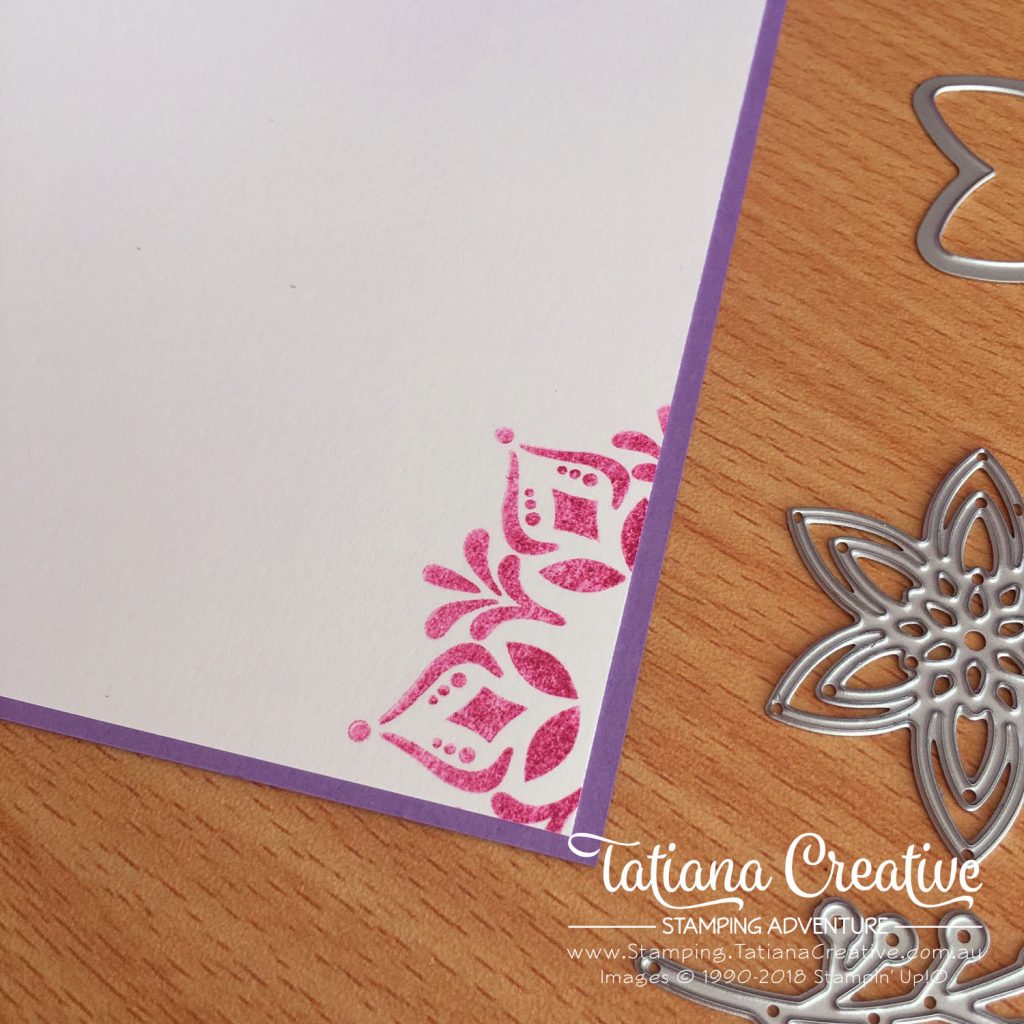
- On some Whisper White card stock stamp the large striped flower image (I used stamped off Costal Cabana) and the smaller flower (I used stamped off Berry Burst). Die cut these out with the coordinating thinlits from the Snowfall Thinlits. Stamp in full strength Berry Burst the large medallion and fussy cut it out.
- On a strip of Whisper White 85mm x 15mm stamp the “Congratulations” sentiment in Costal Cabana. You can use the Triple Banner Punch to create the banner edge on the left.
- To assemble:
- Adhere the medallion using Liquid Multipurpose Glue to the card front.
- Attach the small flower to the large flower and attach them to the card front using Stampin’ Dimensionals. (TIP: add the Silver Metallic Thread to the dimensional before adhering to the card front.
- Using Stampin’ Dimensional for the sentiment strip.
- Dot some Liquid Multipurpose glue around where you would like to add some Iridescent Sequin, allow to set a little before using the Take Your Pick tool to place the sequin.
I’m very happy with this card. I particularly love this colour combination. As always I have created a matching envelope and coordinated the inside of the card:

Below you will find the list of demonstrators who are blogging with me today. I would say this is the biggest blog hop I’ve participated in through Kylie’s training. They all have wonderful projects to share with you, please take some time to visit their pages. Happy Blog Hopping! You have been visiting Tatiana Tobin in Australia!
Thank you for visiting my blog! I hope that I’ve inspired you to be creative.
Bye for now!
Tatiana
- Join Stampin’ Up!® to start getting your products at 20% discount: CLICK HERE
- Request a Catalogue to see what products you can purchase: CLICK HERE
- Subscribe to my newsletter to keep up to date with the latest news: CLICK HERE
- Follow me on Facebook for regular updates and inspiration: CLICK HERE
- Go SHOPPING for clearance items and specials: CLICK HERE
If you live in Australia you can purchase Stampin’ Up!® products from my online store.
Current Host Code (August 2024): NN39AWU4
(Use the hostess code when ordering less than $250. All orders over get a handmade card from me. Orders over $50 will receive a FREE gift, and collect stickers part of my Customer Loyalty Program! Orders over $90 will also get a FREE tutorial bundle the following month!!). Click here to shop now using the current Host Code.
Supplies:
You can purchase the of the supplies I used in this project. Please click on the image below to purchase. Thank you for your support.


Lovely card, looking forward to getting my hands on this set as well!
Thank you Fiona! I’m in love with this set!
This is a gorgeous card, love the colour.
Thank you Sharron! One of my favourite colour combinations.
This is absolutely gorgeous!!
Thank you Ashley!
Congratulations to you too Tatiana! Great card!
Thank you Deb!
Just stunning! Love the color combo too.
Thank you Jessica! It’s one of my favourite colour combinations. I just haven’t used it much!
Love the way you use the thinlist on your background
Thank you Corinne! I saw this on Pinterest (with different framelits) and LOVED it. Had to give it a go and this set was perfect for it.
Great card Tatiana! 🙂
Gorgeous card, Tania!!! Love the detailed background and colors. xx
Very creative adding the layers of cutouts to your card front. Beautiful card.
Thanks Patsy! That was CASEd from a card I saw! I thought this was a fantastic thinlits to do it with!
I really like that you’ve made a stunning card from the snowflake bundle and used totally non-snowflake colours. The background looks fabulous…I must try it! Love it.
Thanks Karen! I look forward to seeing your creation in the future!
a nice technique with the thinlits this way.
Thank you Margriet! That idea I CASEd.
Fabulous card, thanks for sharing it!
Thank you Wirg!
Brilliant card Tatiana. I love the colours and how you have out all the elements together. Thanks for sharing
Thank you Libby! I love this colour combination just haven’t used it much.
Your card today is stunning! A lot of work but so worth the effort. Love it! Thanks for hopping today – it was fun!
Thank you Alison. I agree with you it’s wirth the effort. The blog hop is fun!
Another gorgeous card Tania! xx
Thank you Cheryll xx
Loving all the texture. Your colour choice is amazing.
Thank you Rosalie! I love the colour combination just forget to use it 🤣
Beautiful card! I love the colours!
Thank you Melva! I love this colour combinations.