


Hello everybody!
Welcome to my blog. Today I’m blog hopping with the Global Creative INKspirations team. We are three Stampin’ Up!® demonstrators from around the world (Australia, Netherlands & USA). We hope to share around creativity and INKspire others to be creative. This month we have the theme of Gratitude. This theme can encompass a whole lot of things and it was hard to choose what I wanted to be grateful for. Finally I decided that I always find a sense of gratitude in life when I look at nature. One of my favourite part of nature is seeing butterflies:
[All supplies used in this project are shown at the end of this post and are linked to my Stampin’ Up! online store. You can purchase them and create this project too! Thank you for your support of my stamping adventure]
Card Details:
- Card Base: Whisper White Thick
- Card Front: Whisper White (9.5 x 13.8 cm)
- Card Inside: Basic Black (10 x 14.3 cm) and Whisper White (9.7 x 14 cm)
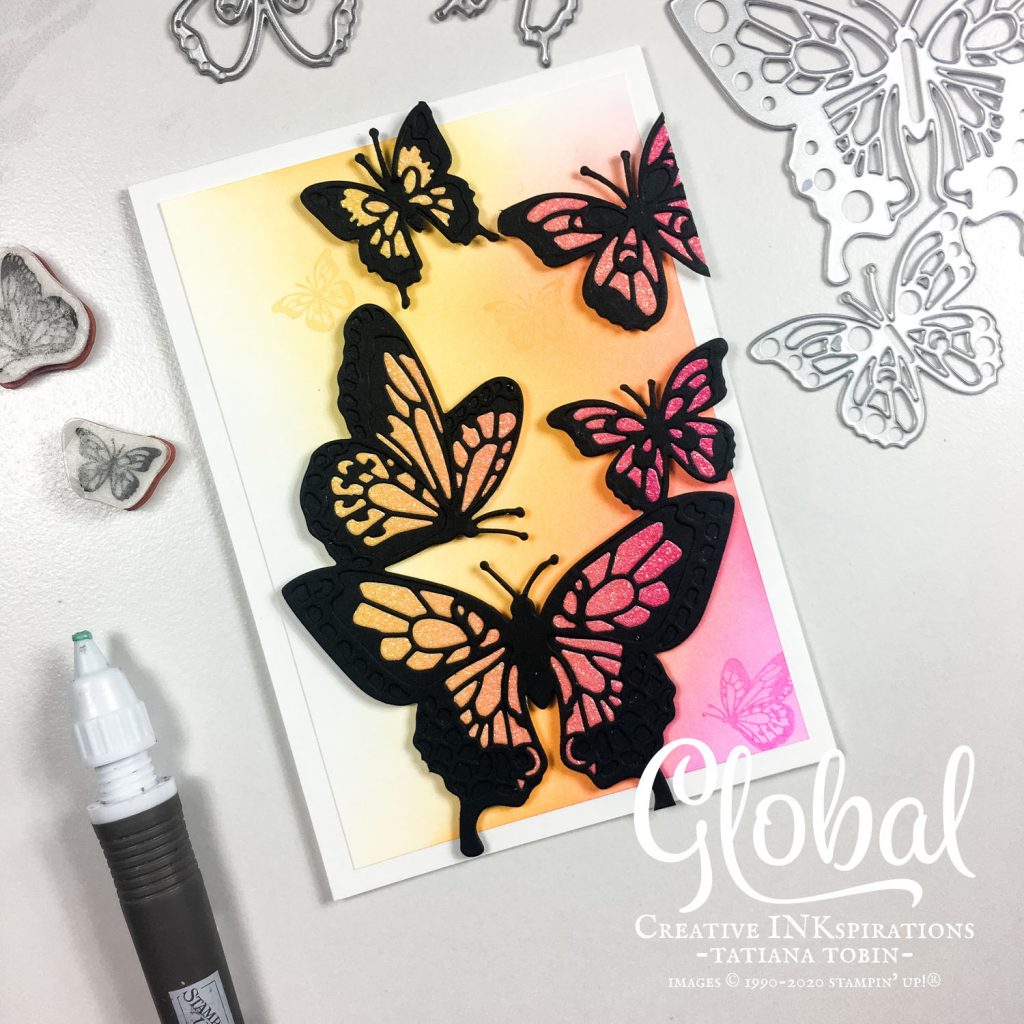
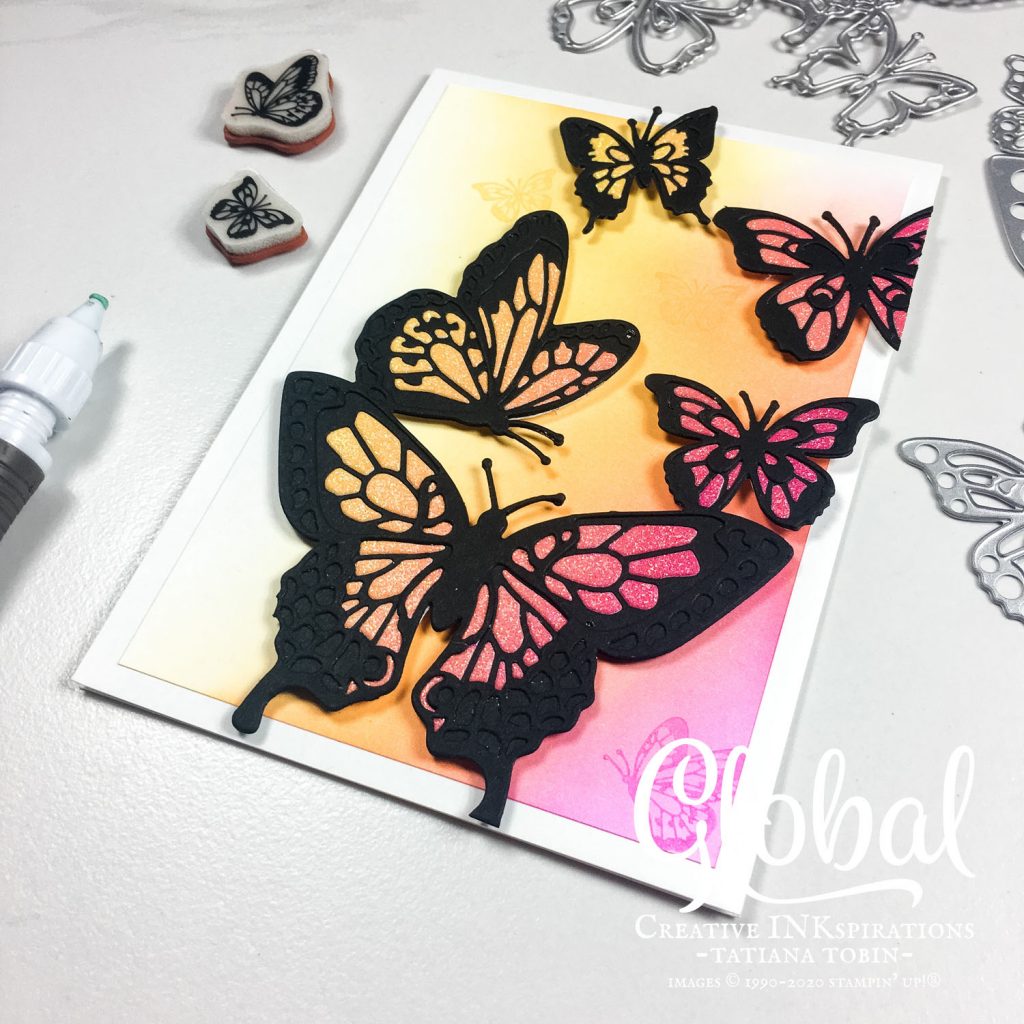
- To create the butterflies:
- There are two butterfly dies, the one that has thicker edges is the bottom piece.
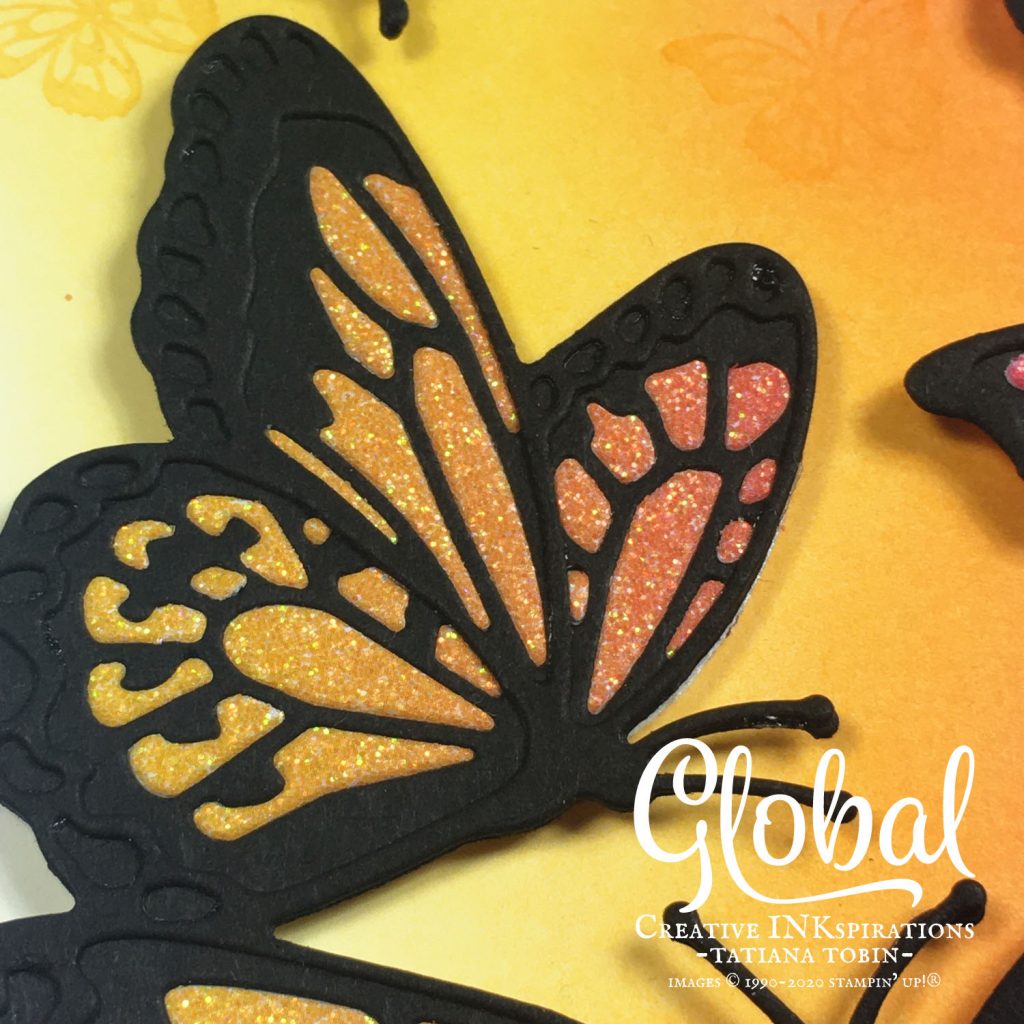
- Die cut the bottom butterfly piece from Basic Black cardstock and use the Take Your Pick Die Brush Tip to remove all the bits.
- Using the top butterfly die piece die cut again in Basic Black but make sure there’s some Adhesive Sheet on the back (the adhesive is optional but highly recommended).
- On a piece of Whisper White cardstock ad some Adhesive Sheet and then trace around the bottom butterfly die making sure the Adhesive Sheet is on top. Using Paper Snips cut around the inside of the outline. You just need the basic butterfly shape no antennas.
- Die cut using the bottom butterfly die the Rainbow Glimmer Paper. From this die cut you want all of the little pieces that fall out from the die cut. TIP: die this piece upside down, ie die then paper then cutting plate – this will help you keep all the inside pieces.
- Remove the release paper from the Whisper White cardstock and place the bottom Basic Black die cut. Then line this up with all the Rainbow Glimmer Paper bits and pop them into the gaps. They kind of fall into place if you manage to line them up and flip. If they don’t then using the Take Your Pick Tool place them into position.
- Remove the release paper from the back of the Basic Black top butterfly die cutout and place on top.
- On the card front blend in some colours to coordinate with those colours of the butterfly wings. Stamp in the coordinating colours smaller butterflies. Adhere to the card base. I used a make up blending brush but you can use Stamping Sponge wedge.
- Using Stampin’ Dimensionals add the Rainbow Glimmer butterflies to your card front. I had one butterfly go over the edge. I cut it off and added it to the inside of the card.
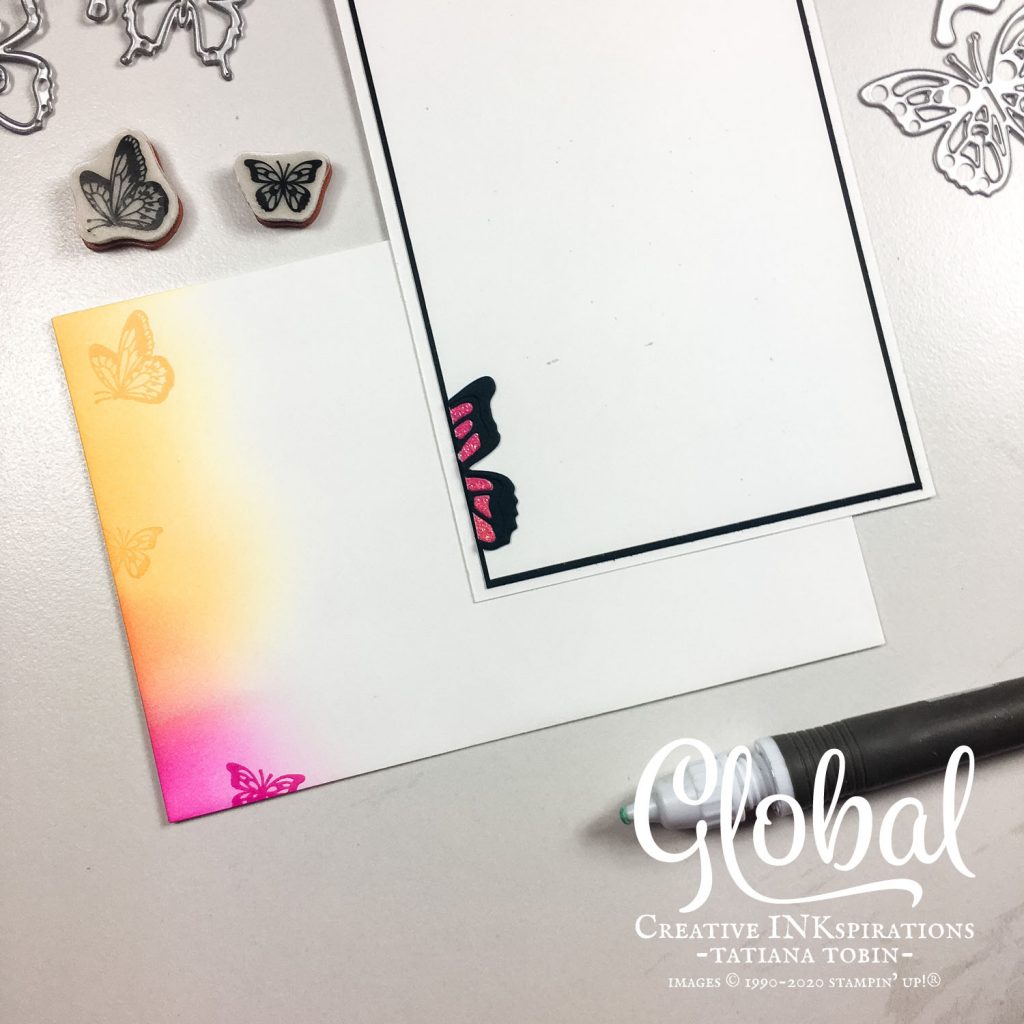
I like to say no project is complete till the inside of the card and the envelope. I had a lot of fun blending on the card front that I decided to do some blending on the envelope too!
Next up is Danielle in the Netherlands. Please visit her hop to see what she has to be grateful for.
Blog Hop List:
Tatiana Tobin <—- You are here!
Danielle Kassing
Angie McKenzie
Thank you for visiting my blog! I hope that I’ve inspired you to be creative.
Bye for now!
Tatiana
- Join Stampin’ Up!® to start getting your products at 20% discount: CLICK HERE
- Request a Catalogue to see what products you can purchase: CLICK HERE
- Subscribe to my newsletter to keep up to date with the latest news: CLICK HERE
- Follow me on Facebook for regular updates and inspiration: CLICK HERE
- Go SHOPPING for clearance items and specials: CLICK HERE
If you live in Australia you can purchase Stampin’ Up!® products from my online store.
Current Host Code (August 2024): NN39AWU4
(Use the hostess code when ordering less than $250. All orders over get a handmade card from me. Orders over $50 will receive a FREE gift, and collect stickers part of my Customer Loyalty Program! Orders over $90 will also get a FREE tutorial bundle the following month!!). Click here to shop now using the current Host Code.
Supplies:
You can purchase the of the supplies I used in this project. Please click on the image below to purchase. Thank you for your support.


Wauw! This is amazing! Love the combination with the Black and glimmer!
Thank you Danielle!
Beautiful!!! Love the color palette and that you used the glimmer paper. The sponging is a lovely touch. Thanks for the inspiration!
Thank you Angie!